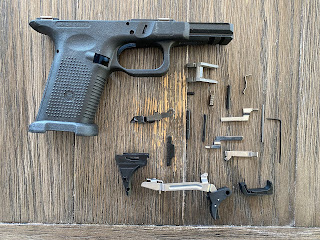
Lone Wolf Freedom Wolf 80% Lower Build
80% pistol lowers have been around for a few years now and have a following for a variety of reasons. Some like them because the frame is not serialized and does not require a transfer through a dealer. Others simply like the changed geometry and grip angle compared to a stock Glock pistol. And finally, if you are going to customize your handgun, starting with an 80% frame lets you customize every single part that goes into the gun.
I have considered 80% builds for several years, but when I have looked into the cost and the time involved, I put off the project time and time again. Most 80% builds are not going to be cheaper than just buying a stock Glock off the shelf. You might be able to get close if you source the absolute cheapest parts that you can find. But those cheap parts are more likely to cause reliability problems and take away some of the joy of making a custom gun. I also worried about making a mistake with the drilling and filing, or just having issues with reliability due to the variety of parts that were installed.
Last Black Friday I received an e-mail from Rainier Arms advertising the Lone Wolf Freedom Wolf 80% lower for $50. The listed MSRP is $150 and currently you can find the lower on the Rainier site for $100 here: Freedom Wolf 80% Lower For $50 I decided it was a worthy winter project to try out.

This post is going to talk about the completion of the lower drilling, filing and gluing. I've decided not to make a step-by-step guide as there are already several posts and videos about it. Instead I'll show a few photos from the build and some thoughts about the process. In following posts I will discuss:
- Lone Wolf Freedom Wolf 80% Lower Build
- Lone Wolf Freedom Wolf Lower Parts Kit Installation
- Assembling the slide parts kit.
- Test firing and overall review.
The first steps are to remove some of the plastic that is blocking the area of the locking block and two areas along the guide rod. Here is the initial image before clean up with the areas that need to be removed.

I was able to remove most of the plastic with a pair of needle nose pliers. The plastic tabs broke off fairly clean, with some mass along the frame and on the bottom that needed to be cleaned up. Some files and a dremmel are handy for the final touch up. Make sure you go slow here and don't remove too much material. Here is a photo with the tabs removed via pliers. You can see there is still some material, primarily towards the bottom that needs cleaned up.

With the internal tabs removed and cleaned up, it's time to drill. The frame comes with a jig and two drill bits. 3mm and 4mm. According to the instructions, you have to make sure that the jig is fully installed and they recommend using a drill press and a vise to hold everything in place. The vise was definitely helpful, just make sure you don't tighten it too much and cause the frame or jig to deflect. I saw several complaints in the reviews that the jig didn't seem to be secure and users were concerned that the frame could move around. I drilled out two frames, one for me and one that my brother bought at the same time. Both of the jigs locked into place on the openings for gluing in the slide rails and seemed very secure.

I did not clamp the vise down and as you can see below I quadruple checked the alignment of the drill bit with the hole before powering on the drill press. Once I was completely confident that the bit was aligned, the drill was turned on and I drilled half way through.


With all of the holes drilled, it is time to install the rails. There are four rails, one for each side, front and back. The shape is pretty obvious for front and back and there is no left or right for the rails. You will have to pay attention to the left and right of the pieces of plastic that are installed over the rails in the back, as they are specific. Here is the back space.

There is an included epoxy that helps to have a small paintbrush to install. They claim the glue is quick drying and that absolutely appears to be the case as the brush would start to harden in between rails that I installed. You start by spreading the epoxy into the space for the rail and then pressing the rail into place. Make sure that you install the rails facing out! This is important to ensure that they actually hold the slide. Below you can see the installed front slide rail. You can see that the shape of the bottom helps to hold it in place. There are also lego style holes that allow some additional lock up between the frame and the piece of plastic that is installed over the metal.

Now that the metal piece is glued in, you add more epoxy and install the plastic piece over it. I have seen some complaints that people don't like the way the plastic pieces are still visible once they are glued into place. You do see the outline of the installed piece. On mine the front pieces fit flush and the back have a very small area that is raised and you can feel if you run your finger over it.

With the pieces glued in and left to cure, the basic completion of the lower is complete. We will take a look at installing the lower parts in the next post. I was very happy with how easily the parts installed and how well the holes were lined up.

The following post will discuss the installation of the slide parts kit and then next will be a post about the reliability and function of this build.
If you have any questions about the process let me know in the comment section below. This is my first attempt at an 80% lower build, so if you have any helpful tips for others completing their own builds, add those to the comments as well.

thank you for the useful tutorial. I also bought 2 of these several years ago when they were on sale. I finally have found the time to build them and will do so tomorrow. Thanks
ReplyDelete